Installing Kali Linux in Gnome Boxes
Guide on installing Kali Linux in GNOME Boxes, setting up a shared folder for easy file transfers, and best practices to keep the system clean and stable for CTFs and labs.
Boxes
Gnome Boxes is a virtualization application like VMware, VirtualBox that used to access virtual systems. Under the hood it is running QEMU, KVM and libvert.
Preparation
In this guide, we will learn how to install Kali in Boxes and setup.
Firstly, download Kali iso from official page
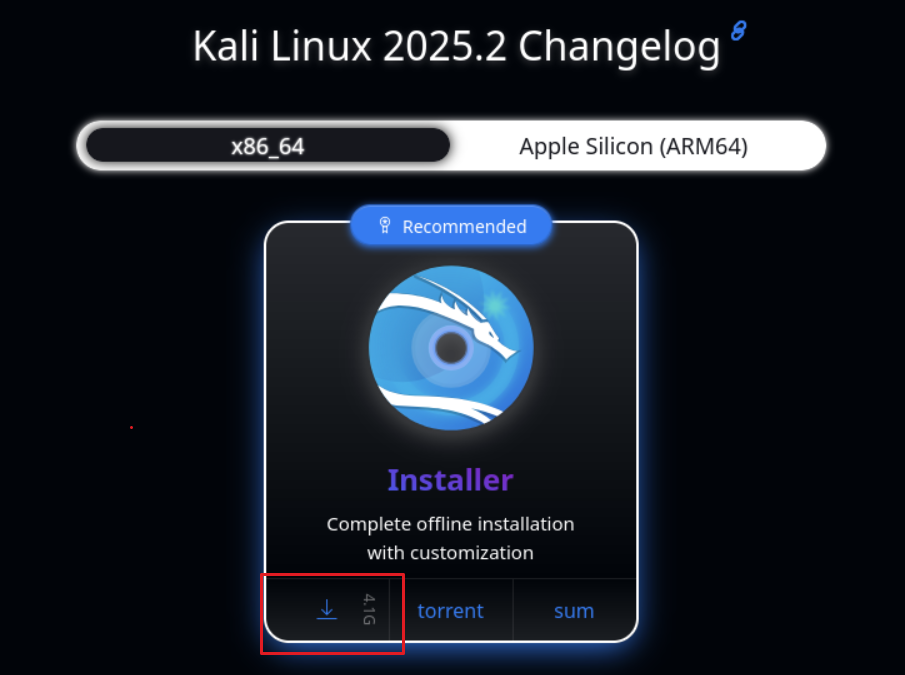 Download Kali iso
Once finishd download, click on the “sum” on the webpage to reveal the iso SHA256sum. We will verify the checksum to make sure it does not have corruption during download.
Run sha256sum -c <<<"5723d46414b45575... Downloads/kali-linux-2025.2-installer-amd64.iso" on your terminal to make sure it is the same. Replace the chcksum value with the one in Kali webpage and the path of the iso location
1
Downloads/kali-linux-2025.2-installer-amd64.iso: OK
If it shows OK means the iso image does not have any corruptions and ready for installation.
Installation
Open Boxes application and click on the + button at the top left and choose “Install from File”
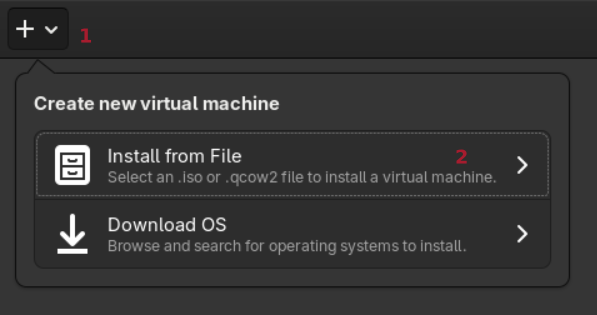 Install from File
Choose the iso that we’ve donwloaded, a pop up menu will appear.
- Enter the VM name
- Choose Debian as Operating System as Kali is based on Debian
- Under Resources, put 4.0 GiB as memory as the minimum 2.0 GiB is not enough based on my personal experience
- For Storage limit I like to use 80.0 GiB
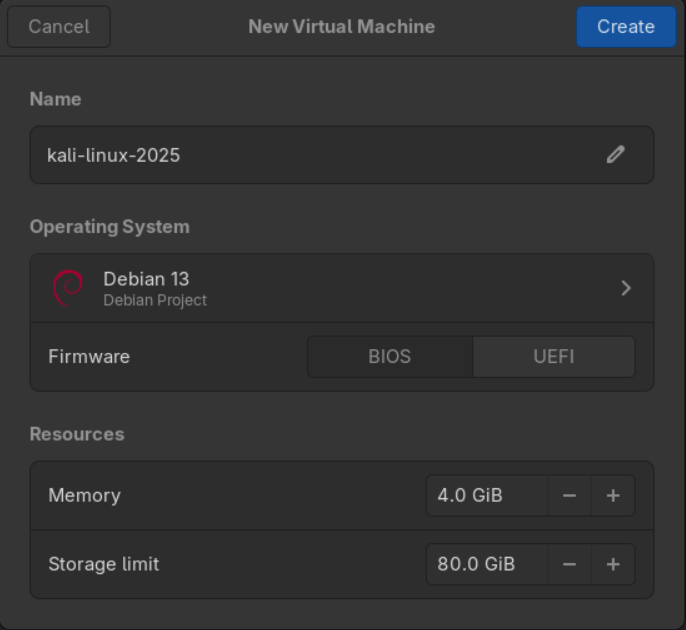 specs of vm
Once the setup is done, click Create to create the VM.
Boot into the VM and follow the official installation steps
Post installation
Copy-paste between Kali and Host
Install spice-vdagent using the command: sudo apt install spice-vdagent
Once it is installed, reboot Kali and now should be able to copy in VM into the system clipboard.
File Transfer / Shared folder
One of the great features Gnome Boxes have is the ability to drag and drop files into the VM. Files will be saved in Desktop.
Shared folder is supported as well. To set it up:
Install spice-webdavd in Kali and start service
sudo apt install spice-webdavdsudo systemctl start spice-webdavd.service
Open Gnome boxes> Preferences> Devices & shares> Under Shared Folders click + to add folder. Input the folder name and click Save
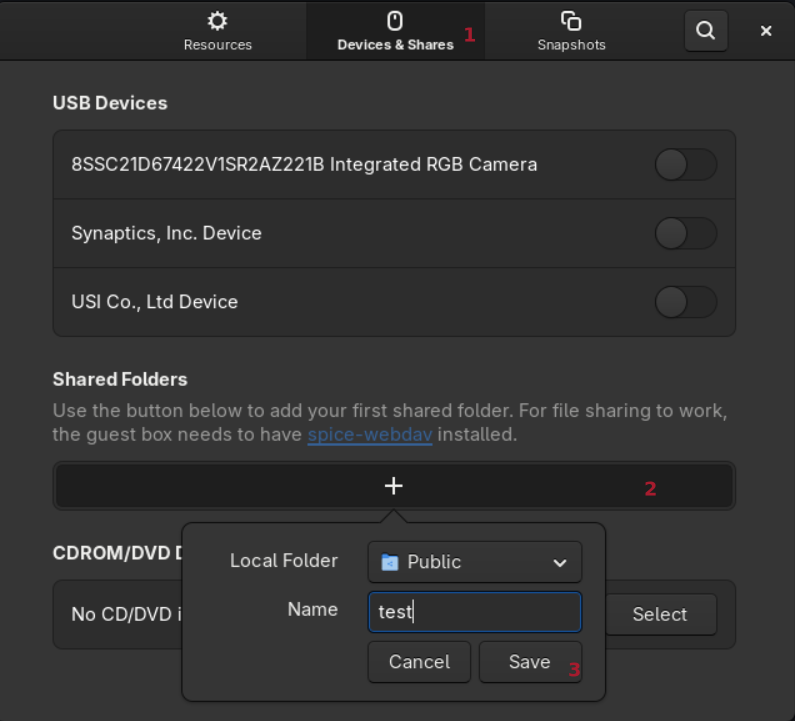 Add folder
In Kali, go to dav://localhost:9843 to access shared folder
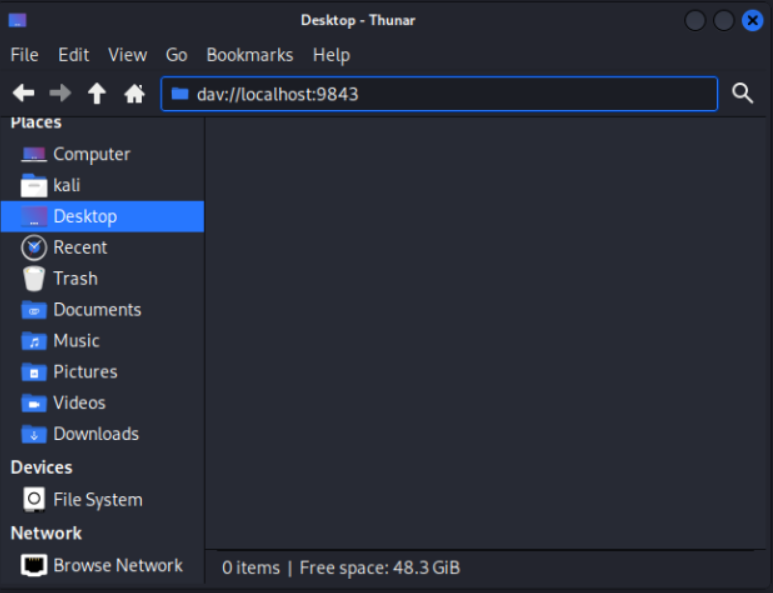 Press enter to go to shared folder
After setting it up, any files inside the test folder is accessible in Kali VM.
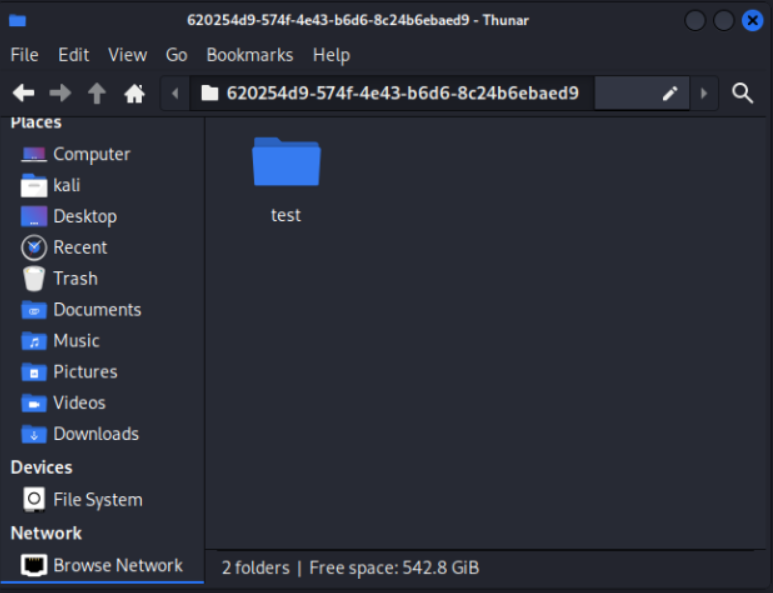 Shared folder
Snapshots
Once the installation is done, shutdown the VM and click on the three dot> Preferences> Snapshots
Click on the + to take a snapshot.
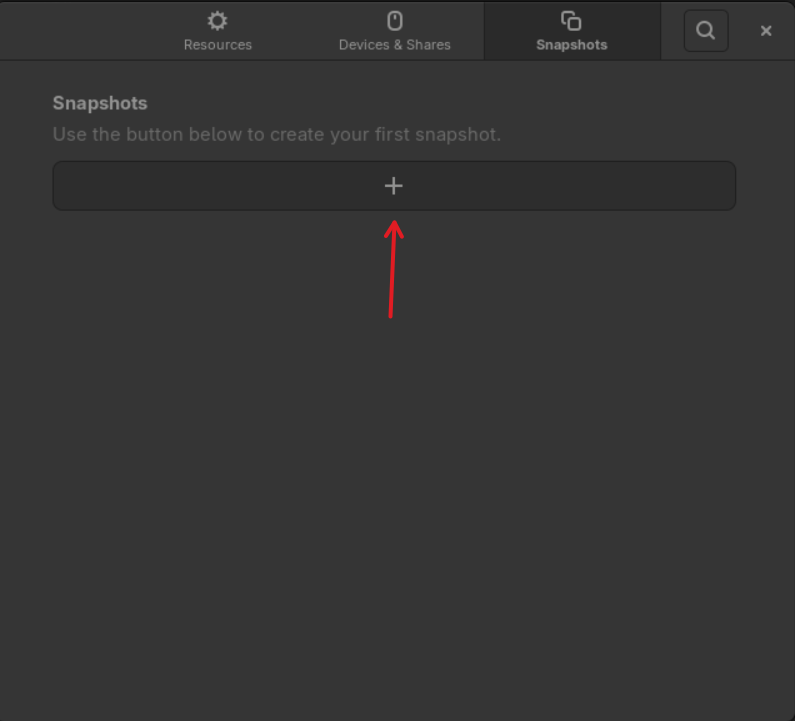 Taking snapshot
Now you will have a clean snapshot you can revert back to should the VM break.
Best Practices for maintaining Kali
Below are some of best practices that I followed to maintaining Kali for optimal performance
Working on clean snapshot and update
Snapshots are a lifesaver for keeping your system clean. Back when I used Kali without snapshots, doing CTFs was messy. Some boxes required me to tweak the hosts file, change the system time, or install odd dependencies for certain tools. Every time, I had to keep track of what I changed and then manually undo it all later which was a huge hassle.
Now, with snapshots, things are much easier. I start from a clean snapshot, make whatever changes I need during the session, and when I’m done, I just reevert back to that clean state using my prviously created snapshots. No more tracking or manually reverting changes, just a fresh system ready for the next box.
Update your Kali regulary
Use the one liner sudo apt-get update && sudo apt full-upgrade -y to update the system from a clean snapshot. After finish upgrading, reboot the system once to ensure it is working then take a new snapshot. With this, you’ll always have the latest up-to-date VM.
Snapshots management
It is good to keep 2~3 snaphots for backup purposes in case the latest snapshot have unexpected issues, you have the ability to revert back to previous stable version.